Makeup brushes collect foundation, powder, skin oil, and dust between uses. Over time, buildup can make bristles feel stiff, leave streaks, and transfer old product onto freshly cleansed skin. Clean tools are not a cure for skin concerns, but regular care supports a cleaner routine and helps brushes work as intended.
Learning how to care for makeup brushes at home does not require a crowded sink or expensive products. A mild cleanser, lukewarm water, and a clean towel are often enough for routine washing. The details matter: avoid soaking the brush heads, reshape damp bristles, and let each brush dry flat with its head slightly over the counter’s edge. Small habits. Better results.
This guide covers seven practical ways to wash, dry, store, and maintain brushes without damaging their shape. It also explains how often different brushes may need attention. A dense foundation brush usually holds more product than a lightly used powder brush, so one schedule may not suit every tool. Even so, waiting until bristles look visibly dirty can mean residue has already built up. I still forget a brush now and then, which is a useful reminder that a realistic routine beats an ideal one that never happens. A quick check after use can help: if the bristles feel tacky or look discolored, it may be time to wash them. With a few repeatable steps, brushes can stay softer, cleaner, and ready for the next application.
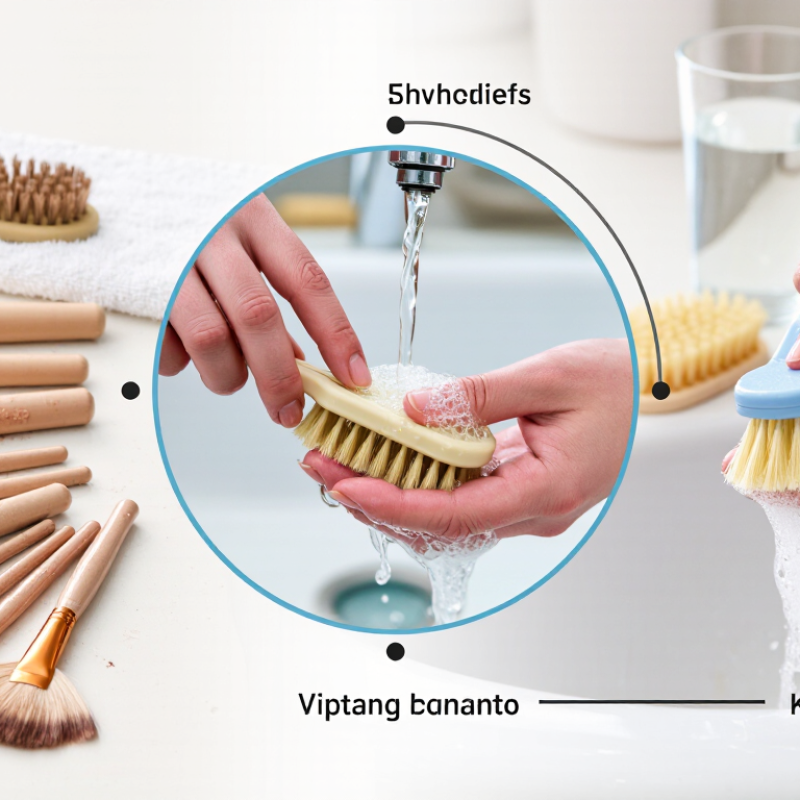
Identify Brush Types and Gather Gentle Cleaning Supplies
Group brushes by their jobs: dense, flat brushes for liquid foundation; soft, rounded brushes for powder or blush; and small, tapered brushes for eye detail. Synthetic fibers usually handle cream products well, while natural fibers often pick up powder evenly. Check the label if you still have it. For a gentle wash, use lukewarm water, mild fragrance-free soap, a clean towel, and a shallow dish. Avoid hot water and harsh cleaners. Keep water away from the metal ferrule, where it can loosen the glue.
The American Academy of Dermatology recommends washing makeup brushes every seven to ten days. A 2019 study by Bashir and Lambert in the Journal of Applied Microbiology found microbial contamination in 93% of tested beauty blenders. Those were sponges, not brushes, so that figure should not be presented as a brush contamination rate. Still, it shows why applicator hygiene matters. Wet only the bristles, work in a little soap, then rinse until the water runs clear. Lay brushes flat to dry, with the bristles extending beyond the counter edge. One easy mistake: setting them upright while wet can let water run into the handle. I still find it tempting to rush the drying step. Don’t.
Remove Loose Makeup and Product Buildup from the Bristles
Before washing, hold the brush over a bin and tap the handle lightly to dislodge loose powder. Sweep the bristles across a clean, dry cloth, moving from base to tip. This removes surface pigment without forcing it deeper into the brush. Cream or liquid makeup needs more attention: dried foundation can cling near the ferrule, where bristles meet the handle. A quick wipe may look effective, yet leave visible residue. Check the brush under bright light. Keep it gentle. Hard rubbing can bend bristles or loosen them over time.
A 2020 study in the Journal of Applied Microbiology examined used cosmetic products and reported bacterial contamination in 79–90% of sampled items. The sample included makeup applicators, though this figure does not mean every brush is contaminated. It does support removing residue regularly, not just when a brush looks dirty. For stubborn buildup, rinse bristles with lukewarm water, keeping the handle angled upward so water does not pool at the ferrule. Work a small amount of mild cleanser through the tips, then rinse until the water runs clear. No soaking. It is easy to rush the rinse; leftover cleanser can make bristles feel stiff. Press them gently in a clean towel and reshape before drying flat.
7 Best Ways to Care for Makeup Brushes at Home
Suggested cleaning intervals for removing loose makeup and product buildup from bristles. Actual needs vary with use; wash brushes sooner if they look or feel dirty.
For a weekly clean, gently wash the bristles with lukewarm water and mild soap, keeping the brush head pointed downward. Rinse thoroughly, reshape the bristles, and lay the brush flat to air-dry.
Wash Brush Heads Without Soaking the Handles
When washing makeup brushes, keep water on the bristles, not the handle. Hold each brush with its head angled downward under lukewarm running water. This helps prevent water from seeping into the ferrule, the metal sleeve that holds the bristles. Wet the hairs gently, keeping the handle and ferrule as dry as possible. A little care matters.
Place a drop of mild soap in your palm, then swirl the brush head lightly until makeup loosens. Rinse with the bristles still pointing down, and avoid pressing or twisting them hard. If the water runs clear, the brush is ready; stubborn cream makeup may need another gentle wash. I still find this part fiddly with dense brushes. Pat the hairs with a clean towel, reshape them with your fingers, and lay the brush near the edge of a counter so the head extends beyond it. Let it dry fully before using it again. Never stand a wet brush upright, since moisture can travel toward the handle and weaken the adhesive over time. Check the handle and ferrule for looseness now and then; small changes are easy to miss.
Rinse Thoroughly and Reshape the Bristles
Rinse thoroughly and reshape the bristles
Rinse each brush under lukewarm running water, keeping the handle and metal ferrule angled upward. Water trapped near the ferrule can loosen adhesive and encourage shedding. Gently part dense bristles with your fingers so the stream reaches the center. Do not force them open. Slow is safer.
The American Academy of Dermatology recommends washing makeup brushes every seven to ten days. A 2019 study in the Journal of Applied Microbiology reported that 93 percent of surveyed beauty sponges had never been cleaned. Sponges are not brushes, but the finding is a useful reminder: tools that touch damp products need regular care. Rinse until the water runs clear, then press the bristles lightly against a clean towel. Never twist or tug.
Reshape the head while it is still damp, restoring its original outline with your fingertips. Lay the brush flat at the edge of a counter, with the bristles extending beyond it, and let it air-dry completely. Avoid standing it upright while wet. This routine can feel fussy, and it is easy to stop rinsing too soon. Check the center once more before drying. That small pause matters.
Dry Brushes Safely and Store Them Between Uses
After washing, press a clean towel gently around the bristles to remove excess water. Do not twist or pull them; that can bend the hairs out of shape. Reshape the brush head with your fingers, then lay the brush on a dry towel with its bristles extending past the counter’s edge. Air can reach the whole head this way. Keep the handle on a flat surface and the bristles pointed slightly downward, so water does not seep into the ferrule, the metal band joining hairs to handle. Avoid heaters and direct sunlight, which may damage hairs or loosen adhesive. Patience matters.
Let brushes dry completely before storing them. Dense powder brushes may need longer than small eye brushes, so check the center of the bristles, not just the tips. A damp core can develop an unpleasant smell inside a closed case. I used to put brushes away when their surfaces felt dry; that was not a reliable test. Give them more time if they feel cool or clumped.
For everyday storage, place dry brushes upright with the bristles facing up in a clean holder. Keep the holder away from sink splashes, dust, and steamy showers. If you prefer a drawer or pouch, make sure it is clean and fully dry, and avoid packing brushes tightly. A breathable holder is often more practical than a sealed container, though it may collect dust and need regular cleaning.
7 Best Ways to Care for Makeup Brushes at Home - Dry Brushes Safely and Store Them Between Uses
| Care step |
What to do |
Suggested timing |
Why it helps |
| 1. Remove loose product |
Gently sweep the bristles on a clean towel or brush-cleaning surface after use. Avoid pulling or rubbing the hairs roughly. |
After each use |
Reduces product buildup between washes and helps preserve the brush shape. |
| 2. Wash with a gentle cleanser |
Wet the bristles with lukewarm water, work in a small amount of mild cleanser, then rinse until the water runs clear. Keep the handle and metal ferrule as dry as possible. |
About weekly for frequently used face brushes; more often if visibly soiled |
Removes makeup, oil, and residue. Avoiding prolonged water exposure near the ferrule helps protect the adhesive inside. |
| 3. Clean eye brushes between products |
Use a clean brush for each person. Clean eye brushes between different products or colors when needed, and wash them regularly with water and cleanser. |
Between users; between products when practical |
Helps limit product transfer and keeps colors from mixing. Never share brushes used around the eyes without cleaning them first. |
| 4. Rinse with the bristles pointing down |
Hold the brush with its bristles angled downward under a gentle stream. Do not submerge the whole brush or leave it soaking in water. |
During every wash |
Helps keep water from collecting inside the ferrule, where it may weaken the adhesive or damage the handle. |
| 5. Blot and reshape |
Press the bristles gently between a clean towel to remove excess water, then use your fingers to return them to their original shape. Do not twist or wring them. |
Immediately after rinsing |
Removes excess moisture without stressing the bristles and helps the brush dry in the right shape. |
| 6. Dry flat with airflow |
Lay brushes flat on a clean, dry towel with the bristles extending over the edge of a counter. Keep them away from direct heat and leave space between brushes. |
After every wash; allow them to dry completely, often overnight |
Airflow helps the bristles dry evenly. Drying upright while wet can let water run toward the ferrule and handle. |
| 7. Store clean and dry |
Once fully dry, place brushes upright in a clean holder or in a clean, dry case. Keep bristles protected from dust, and do not seal damp brushes in a closed container. |
Between uses |
Keeps brushes organized and helps prevent dust, moisture, and contact with dirty surfaces from reaching the bristles. |
Conclusion
Learning how to care for makeup brushes at home starts with identifying the different brush types and choosing gentle cleaning supplies suited to their bristles. Before washing, loosen and remove surface makeup and product buildup with care, so the brush heads are easier to clean. Wash only the bristles, keeping the handles and brush joints from becoming soaked. This helps protect the materials that hold the brush together.
Rinse each brush thoroughly until the water runs clear, then gently reshape the bristles to their original form. Let the brushes dry safely with the heads positioned so moisture does not collect near the handles. Once fully dry, store them in a clean, dry place between uses. Regular, gentle care helps brushes stay in good condition and makes them more comfortable to use over time.

 MVX Beauty