Makeup brushes are small tools, yet they can quickly create a crowded, confusing routine. A fluffy powder brush may hide beneath an angled contour brush, while damp bristles sit too close to clean ones. This is why “how to organize your makeup brushes” deserves more than a simple storage suggestion.
The beauty industry is expanding, and personal collections are becoming more varied. McKinsey’s The Beauty Market in 2023 report estimated that the global beauty market could reach about $580 billion by 2027, with annual growth near 6%. Circana also reported that U.S. prestige beauty sales increased by 14% in 2023. More products often mean more brushes, more textures, and more opportunities for clutter. Organization must therefore support speed, hygiene, and easy identification.
Cleanliness matters as much as appearance. The American Academy of Dermatology Association recommends washing makeup brushes every seven to ten days. Brushes used with liquid or cream products may need closer attention. Store them upright only after they are completely dry. Keep handles visible. Separate face brushes from eye brushes, and place frequently used tools within reach.
Acrylic cups can work well. So can divided drawers.
Still, no system is perfect. I sometimes keep a brush because it feels familiar, even when I rarely use it. That hesitation reveals a useful question: does the arrangement serve your routine, or merely display your collection? This guide examines practical layouts, cleaning habits, container choices, and realistic ways to maintain order without turning makeup into a daily chore.
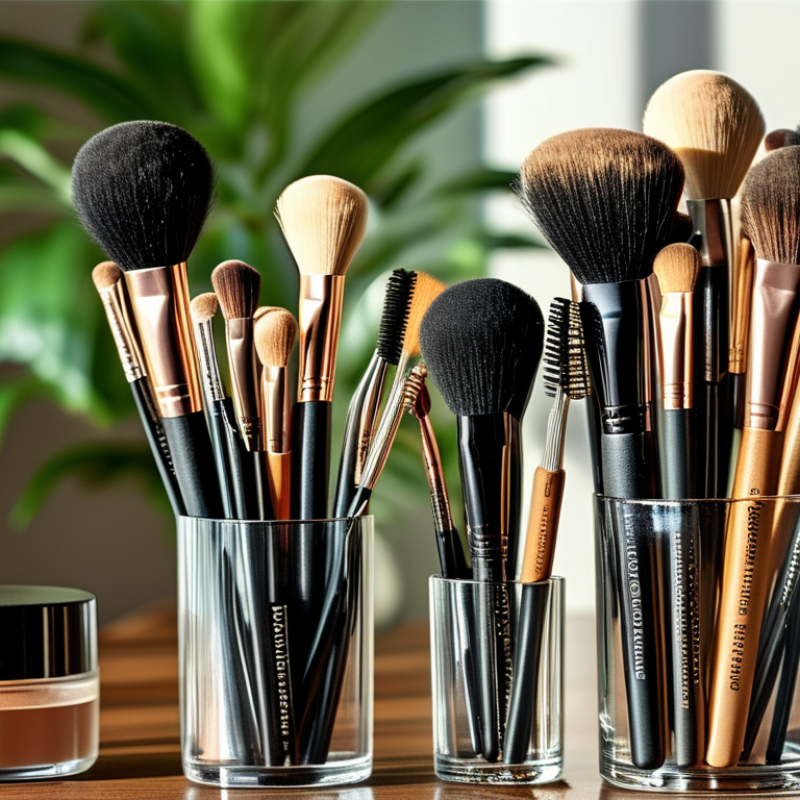
What Is the Best Way to Organize Your Makeup Brushes?
Assess Brush Types and Uses with a Professional Inventory Audit
A professional inventory audit starts with function, not storage style. Place every brush on a clean towel under bright light. Identify its main use: complexion, concealing, powder, blush, eyeshadow, liner, or detail work. Check the bristles for shedding, stiffness, uneven edges, and product buildup. Inspect the handle and ferrule for cracks or looseness. A brush that looks attractive may still perform poorly.
Record each brush in a simple inventory sheet. Note its shape, size, material, frequency of use, and condition. Mark duplicates clearly. I usually separate daily tools from occasional brushes, then store them upright in divided containers. Keep dense complexion brushes away from delicate eye brushes. This prevents heavier tools from crushing softer bristles. My first audits were too focused on quantity. I later noticed that five similar blending brushes created confusion, not efficiency.
Tips: Test each brush with one controlled motion. If the application feels patchy, move it to a review group. Clean tools according to their material and condition, then let them dry fully before storage. Keep a small “needs review” section for uncertain items. I still misclassify some angled brushes because their shapes overlap. That uncertainty is useful. Reassess them after real use, especially under natural light. A practical audit should change as your techniques, products, and habits change.
Organize brushes by makeup category and application order: complexion first, followed by cheeks, eyes, brows, and lips. Store clean, completely dry brushes upright or horizontally in a covered, ventilated holder, with frequently used tools kept within easy reach.
| Audit ID | Brush Type | Primary Use | Recommended Shape and Density | Best Product Formula | Application Technique | Suggested Inventory | Cleaning Frequency | Storage Location | Inspection Criteria | Audit Status |
|---|---|---|---|---|---|---|---|---|---|---|
| MB-001 | Foundation Brush | Apply and blend liquid or cream foundation across the face. | Flat or softly rounded head with dense, flexible bristles. | Liquid and cream | Use pressing, stippling, and short outward strokes to build even coverage. | 1–2 | After each use when shared; otherwise at least weekly. | Complexion section, upright holder | Check for hardened product, streaking, shedding, and misshapen bristles. | Ready |
| MB-002 | Concealer Brush | Place and blend concealer under the eyes and around blemishes. | Small, flat, tapered head with firm but soft bristles. | Liquid and cream | Pat product onto the target area, then soften the edges with small tapping motions. | 2 | After each use for eye-area application; otherwise several times weekly. | Complexion section, separate from large face brushes | Inspect for pigment buildup, rough tips, and product transfer between areas. | Ready |
| MB-003 | Powder Brush | Apply setting powder, pressed powder, or light finishing powder. | Large, rounded, loosely packed head for a diffused finish. | Loose and pressed powder | Load lightly, tap off excess, and sweep or press over the skin. | 1–2 | Weekly for personal use; more often if used with cream products. | Complexion section, largest-brush compartment | Check whether powder is trapped at the base or the brush feels stiff. | Ready |
| MB-004 | Blush Brush | Apply blush to the apples or upper planes of the cheeks. | Medium-sized, softly rounded or angled head with moderate density. | Powder and some cream formulas | Use light circular or sweeping motions from the cheeks toward the temples. | 1–2 | Weekly; clean between shades when color accuracy is important. | Cheek section | Look for residual pigment, uneven loading, and flattened bristle tips. | Ready |
| MB-005 | Contour Brush | Define the hollows of the cheeks, jawline, forehead, or sides of the nose. | Angled or tapered head with controlled, medium density. | Powder and cream | Place the product precisely, then blend the edges to avoid visible lines. | 1 | Weekly; clean more frequently for cream contour. | Cheek section, precision compartment | Confirm that the angle remains intact and no dark pigment remains near the ferrule. | Review |
| MB-006 | Highlighter Brush | Apply illuminating product to the cheekbones, bridge of the nose, and brow bone. | Small-to-medium tapered, fan, or softly rounded head. | Powder and cream | Use a light sweeping or tapping motion on raised areas of the face. | 1 | Weekly; clean between noticeably different shades. | Cheek section, kept away from matte powders | Check for excess product that can cause uneven or overly concentrated application. | Ready |
| MB-007 | Blending Eyeshadow Brush | Diffuse edges and combine eyeshadow shades in the crease. | Fluffy, rounded, tapered head with flexible bristles. | Powder | Blend with small circular or windshield-wiper motions using minimal pressure. | 2–3 | After each color family or at least weekly. | Eye section, clean blending compartment | Check for stained bristles, product dust, and loss of softness. | Ready |
| MB-008 | Eyeshadow Shader Brush | Pack eyeshadow onto the lid with concentrated color payoff. | Flat, compact, medium-firm head with a rounded or squared edge. | Powder, pressed pigment, and cream | Press or pat product onto the lid instead of sweeping it away. | 2 | After each use when switching colors; otherwise weekly. | Eye section, flat-brush compartment | Inspect for pigment buildup, hardened cream product, or separated bristles. | Ready |
| MB-009 | Eyeliner Brush | Create precise lines along the upper or lower lash line. | Very fine angled or pointed head with firm, tightly grouped bristles. | Gel, cream, and wet cake formulas | Use short connected strokes while keeping the brush close to the lash line. | 1–2 | After every use to prevent product from drying in the bristles. | Eye section, protected precision slot | Check for dried product, bent tips, and loss of line control. | Review |
| MB-010 | Angled Brow Brush | Fill, define, and shape the eyebrows with controlled strokes. | Thin, angled, firm head designed for short hair-like marks. | Powder, pomade, and cream | Apply sparse strokes in the direction of natural hair growth. | 1 | After each use with pomade; weekly with powder. | Brow section, capped or protected compartment | Check for product residue, softened edges, and loss of the angled profile. | Ready |
| MB-011 | Spoolie Brush | Comb brow hairs, distribute brow product, and separate lashes. | Spiral fiber head with evenly spaced, flexible bristles. | Brows, mascara, and grooming products | Brush through hairs in one direction using light, controlled passes. | 2 | After each use when used on lashes; otherwise several times weekly. | Brow and eye section, covered container | Discard if bristles are bent, contaminated, or difficult to clean completely. | Replace |
| MB-012 | Lip Brush | Define the lip edges and apply lipstick or lip color precisely. | Small, flat, tapered head with firm, smooth bristles. | Cream, liquid, and balm-like lip products | Outline the edges first, then fill the center using short, even strokes. | 1–2 | After every use, especially when shared or used with multiple shades. | Lip section, covered and separate from eye tools | Check for waxy residue, staining, odor, or bristles that no longer form a clean edge. | Ready |
| MB-013 | Fan Brush | Apply a light veil of highlighter or remove loose eyeshadow fallout. | Wide, thinly spread fan shape with soft, flexible bristles. | Loose and pressed powder | Use a gentle sweeping motion with minimal pressure. | 1 | Weekly or whenever visible powder accumulates. | Specialty section, stored horizontally or in a wide slot | Check that the fan shape is not crushed and that the bristles remain evenly spread. | Ready |
| MB-014 | Detail Brush | Apply precise color to the inner corner, lower lash line, or small facial areas. | Small pointed or pencil-shaped head with controlled density. | Powder, cream, and gel | Place product exactly where needed, then soften only the perimeter. | 1–2 | After each use when used near the eye; otherwise weekly. | Eye section, precision compartment | Inspect for a sharp, intact tip and complete removal of cream or gel residue. | Ready |
: Organize brushes by function, not appearance. Separate complexion, concealing, powder, blush, eye, liner, and detail brushes. Keep daily tools apart from occasional ones. Use divided containers for upright storage. A beautiful holder cannot fix poor brush condition.
Place every brush on a clean towel under bright light. Record its shape, size, material, usage, and condition. Check for shedding, stiffness, uneven edges, and product buildup. Inspect handles and metal joints for cracks or looseness. Test each brush with one controlled motion.
Wash frequently used brushes every seven to ten days. This schedule helps remove oil, dead skin, pigment, and moisture. A phone reminder can help. I sometimes miss the exact day. That is a warning, not a reason to stop.
Rinse the bristles with lukewarm water. Work a mild cleanser through the bristles. Rinse until the water runs clear. Press out moisture with a clean towel. Reshape the brush gently. Do not soak the metal joint.
Dry brushes horizontally on a clean towel. Let the bristles extend beyond the counter edge. This keeps water away from the handle joint. Never place a wet brush inside a closed container. Ventilation matters.
Keep dense face brushes away from delicate eye brushes. Heavy tools can crush softer bristles. Store face brushes upright in a ventilated holder. Place eye brushes in a shallow, dry tray. Avoid damp bathroom air when possible.
Replace a brush when bristles stay stiff after cleaning. Replace it if shedding becomes heavy or the shape remains distorted. A sour smell or hardened makeup also signals trouble. Cracked handles and loose joints need attention. Do not force damaged tools to perform.
Avoid sharing makeup brushes, even with close friends. Used bristles can collect residue and microorganisms. Keep clean and used brushes separate. Check brush condition every week. Clear bristles may still hide buildup.
The best way to organize your makeup brushes begins with a practical inventory audit. Identify each brush by its shape, purpose, and product compatibility, then group them by function, such as complexion, eyes, lips, or detail work. Within each category, arrange brushes by frequency of use so everyday tools remain easy to reach while occasional brushes stay protected. This approach makes how to organize your makeup brushes more efficient and helps prevent unnecessary clutter.
Storage also plays an important role in hygiene. Choose a clean, ventilated container that allows brushes to dry and reduces moisture and microbial buildup. Wash frequently used brushes every 7–10 days, following dermatology hygiene guidance, and allow them to dry completely before storing them. Finally, inspect handles, ferrules, and bristles regularly. Replace tools that shed excessively, lose their shape, develop cracks, or remain difficult to clean, since damaged brushes can interfere with an even and hygienic makeup application.

 MVX Beauty